Adım 1: Windows'ta IIS'in açılması
1.yol
# This script installs IIS and the features required to
# run West Wind Web Connection.
#
# * Make sure you run this script from a Powershel Admin Prompt!
# * Make sure Powershell Execution Policy is bypassed to run these scripts:
# * YOU MAY HAVE TO RUN THIS COMMAND PRIOR TO RUNNING THIS SCRIPT!
Set-ExecutionPolicy Bypass -Scope Process

# To list all Windows Features: dism /online /Get-Features
# Get-WindowsOptionalFeature -Online
# LIST All IIS FEATURES:
# Get-WindowsOptionalFeature -Online | where FeatureName -like 'IIS-*'

Enable-WindowsOptionalFeature -Online -FeatureName IIS-WebServerRole
Enable-WindowsOptionalFeature -Online -FeatureName IIS-WebServer
Enable-WindowsOptionalFeature -Online -FeatureName IIS-CommonHttpFeatures
Enable-WindowsOptionalFeature -Online -FeatureName IIS-HttpErrors
Enable-WindowsOptionalFeature -Online -FeatureName IIS-HttpRedirect
Enable-WindowsOptionalFeature -Online -FeatureName IIS-ApplicationDevelopment

Enable-WindowsOptionalFeature -online -FeatureName NetFx4Extended-ASPNET45
Enable-WindowsOptionalFeature -Online -FeatureName IIS-NetFxExtensibility45

Enable-WindowsOptionalFeature -Online -FeatureName IIS-HealthAndDiagnostics
Enable-WindowsOptionalFeature -Online -FeatureName IIS-HttpLogging
Enable-WindowsOptionalFeature -Online -FeatureName IIS-LoggingLibraries
Enable-WindowsOptionalFeature -Online -FeatureName IIS-RequestMonitor
Enable-WindowsOptionalFeature -Online -FeatureName IIS-HttpTracing
Enable-WindowsOptionalFeature -Online -FeatureName IIS-Security
Enable-WindowsOptionalFeature -Online -FeatureName IIS-RequestFiltering
Enable-WindowsOptionalFeature -Online -FeatureName IIS-Performance
Enable-WindowsOptionalFeature -Online -FeatureName IIS-WebServerManagementTools
Enable-WindowsOptionalFeature -Online -FeatureName IIS-IIS6ManagementCompatibility
Enable-WindowsOptionalFeature -Online -FeatureName IIS-Metabase
Enable-WindowsOptionalFeature -Online -FeatureName IIS-ManagementConsole
Enable-WindowsOptionalFeature -Online -FeatureName IIS-BasicAuthentication
Enable-WindowsOptionalFeature -Online -FeatureName IIS-WindowsAuthentication
Enable-WindowsOptionalFeature -Online -FeatureName IIS-StaticContent
Enable-WindowsOptionalFeature -Online -FeatureName IIS-DefaultDocument
Enable-WindowsOptionalFeature -Online -FeatureName IIS-WebSockets
Enable-WindowsOptionalFeature -Online -FeatureName IIS-ApplicationInit
Enable-WindowsOptionalFeature -Online -FeatureName IIS-ISAPIExtensions
Enable-WindowsOptionalFeature -Online -FeatureName IIS-ISAPIFilter
Enable-WindowsOptionalFeature -Online -FeatureName IIS-HttpCompressionStatic

Enable-WindowsOptionalFeature -Online -FeatureName IIS-ASPNET45

# If you need classic ASP (not recommended)
#Enable-WindowsOptionalFeature -Online -FeatureName IIS-ASP


# The following optional components require
# Chocolatey OR Web Platform Installer to install


# Install UrlRewrite Module for Extensionless Urls (optional)
###  & "C:\Program Files\Microsoft\Web Platform Installer\WebpiCmd-x64.exe" /install /Products:UrlRewrite2 /AcceptEULA /SuppressPostFinish
#choco install urlrewrite -y

# Install WebDeploy for Deploying to IIS (optional)
### & "C:\Program Files\Microsoft\Web Platform Installer\WebpiCmd-x64.exe" /install /Products:WDeployNoSMO /AcceptEULA /SuppressPostFinish
# choco install webdeploy -y

# Disable Loopback Check on a Server - to get around no local Logins on Windows Server
# New-ItemProperty HKLM:\System\CurrentControlSet\Control\Lsa -Name "DisableLoopbackCheck" -Value "1" -PropertyType dword
Bu script yönetici yetkisi ile açılmış bir powershell penceresinde kopyala yapıştır yapılarak IIS yüklenebilir.
2.yol
-
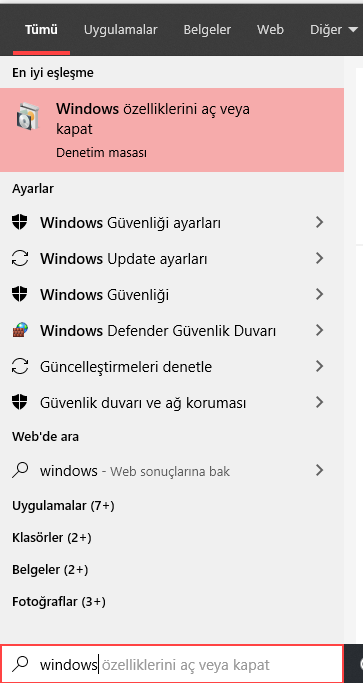
Başlat menüsünde windows özellikleri yazılarak arama yapılır.
-
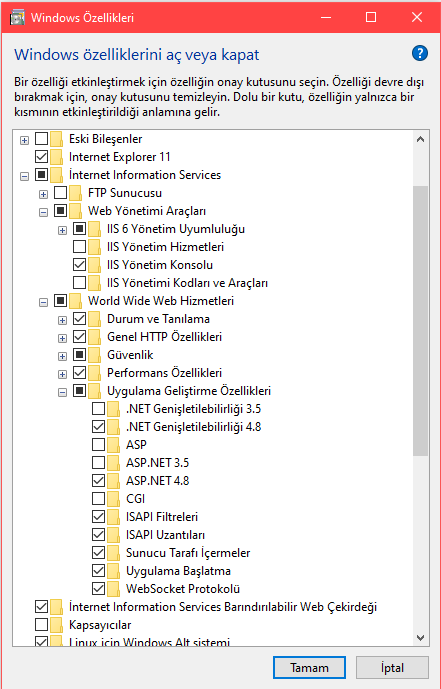
Gelen ekranda IIS ile alakalı aşağıda gösterilen seçenekler işaretlenir.


Bu adımlar IIS’i kurmak için diğer bir yoldur.
Adım 2: Hosting bundle kurulumu
Download .NET Core 3.1 (Linux, macOS, and Windows) adresine gidilir. Bu adreste sağ tarafta bulunan Hosting Bundle tıklanarak indirilir.

Adım 3: Visual Runtime 2019'un kurulması
https://support.microsoft.com/tr-tr/help/2977003/the-latest-supported-visual-c-downloads sitesine gidilir. Sitedeki hem x86 hem de x64 olan dosyalar indirilip kurulur.

Adım 4: Windows'ta IIS'in yeniden başlatılması ve kontrol edilmesi
Yukarıdaki adımlar sırasıyla tamamlandıktan sonra IIS'in tekrar başlatılması gerekmektedir. IIS'i yeniden başlatmak için başlat çubuğunda IIS yazıp bulunur ve yönetim programı açılır.
Gelen ekranda sağ taraftaki menüden Yeniden Başlat seçeneği ile IIS yeniden başlatılabilir.

Kontrol sağlamak için Modüller ekranına girilir

Gelen ekranda AspNetCoreModuleV2’nin yüklü olduğu görülmelidir.

Eğer bu modülü yüklü görüyor iseniz IIS başarılı bir şekilde sisteme kurulmuş demektir.